Description
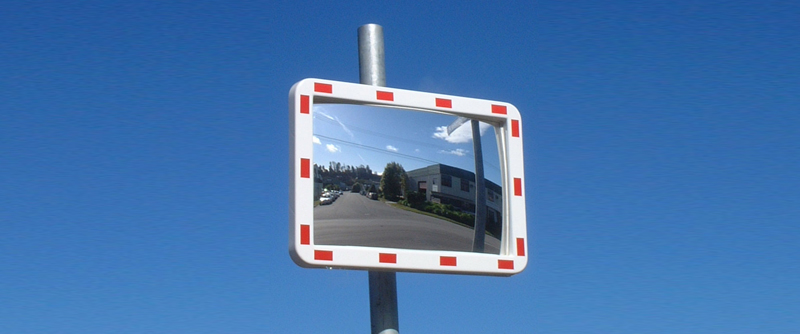
Outdoor Pro Series Rectangular Convex Mirrors
Designed specifically for use in traffic applications, the Pro Series boasts many unique advantages. The scientifically engineered radius of curvature plus the visibility enhancing red reflective markings equals the most effective road safety mirror available. In addition, the back is made from a 100% UV stabilised advanced plastic composite ensuring superior longevity and strength.
Features
- 2mm acrylic mirror face
- Pure reflective coating
- Large radius of curvature for minimum distance distortion
- Red reflective markings on the frame for greater visibility
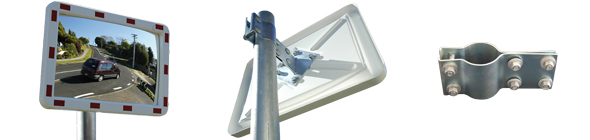
- Very robust post clamp bracket for easy installation
- ASA rectangular frame - ASA is a robust advanced plastic impregnated with 100% UV resistance
- Wall mounting adaptor, optional extra
Suitable Uses
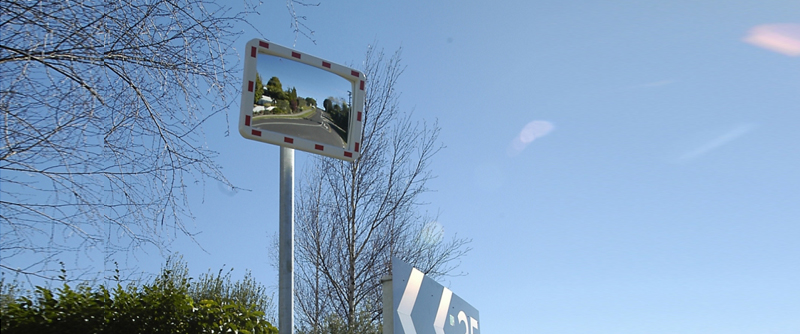
- Road and Traffic Safety
- High Visibility
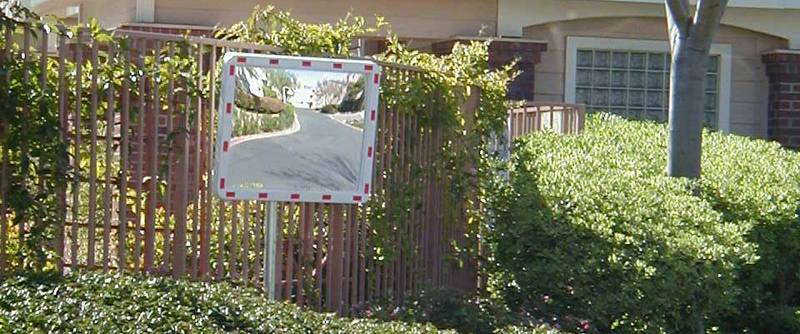
- Driveways and Carparks
- Outdoor Security around Buildings
- Security Checkpoints and Border Control
 Download Information Sheet pdf.
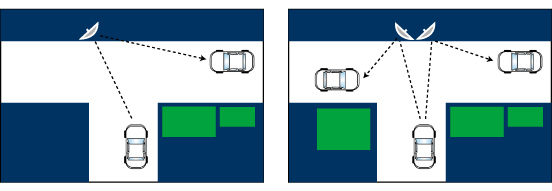
Positioning
Specifications
| Product Code | Size Diameter | View Distance | Mirror Face | Mirror Back | Bracket Length |
|---|---|---|---|---|---|
| 18642R | 600x400mm | Up to 38m | 2mm Acrylic | ASA Vinyl | 75mm dia. Pole Clamp |
| 18645R | 800x600mm | Upt o 50m | 2mm Acrylic | ASA Vinyl | 75mm dia. Pole Clamp |
| 18648R | 1000x800mm | Over 50m | 2mm Acrylic | ASA Vinyl | 75mm dia. Pole Clamp |
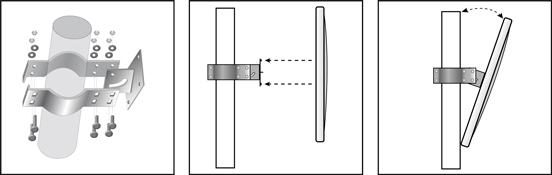
Installation Guide
Pro Series Clamp Bracket Installation Guide:
Pole Mounting - Clamp Bracket:
- Decide the appropriate place to site the mirror on 75mm pole.
- Fix clamp and mirror mount assembly to the pole.
- Make sure adjustment slot is to the bottom
- Fix the mirror to the clamp bracket.
- Once the desired position has been found, tighten the bolts and nuts.
- Now installation is complete, remove the protective film from the mirror face.
Wall Mounting - Clamp Bracket:
- Decide the appropriate place to site the mirror (on a flat surface) and fix the Wall Adaptor using suitable hardware.
- Fix clamp and mirror mount assembly to the Wall Adaptor making sure the slot is to the bottom.
- Fix the mirror face to the clamp bracket.
- Once the desired position has been found, tighten the bolts and nuts.
- Now installation is complete, remove the protective film from the mirror face.

Cleaning Guide
Acrylic Mirror Cleaning Guide:
General Cleaning:
DuraVisionTM recommend cleanning their acrylic mirror faces with soap and water and then with a clean, soft, lint free, damp cloth. Use a non-abrasive polish, such as Johnson’s Pledge or Mr Sheen for a clear bright reflection.
Saturate a clean soft cloth with polish, then spray the mirror face with polish. Wipe the wetted cloth over the mirror surface. With a another clean dry cloth buff the mirror face until it is clear of polish.
DO NOT USE:
- abrasives
- acids
- solvents such as petrol and laquer thinners
Graffiti Removal:
Any graffiti should be removed from the mirror face as soon as possible and preferably within 24 hours. To remove graffiti, use a non-abrasive substance such as De-Solv-it Stain Remover. Not all graffiti cleaning agents are suitable. Failure to use an approved cleaning agent may damage the mirror surface.
Scratches:
To remove scratches or repair blemishes on acrylic mirror faces only, use the following products:
- For cleaning use NOVUS plastic polish #1
- For fine scratches use NOVUS plastic polish #2
- For badly scratched surfaces use NOVIS plastic polish #3 followed by #2 and #1.
Additional Images
Pro Series Rectangular Mirror - Blind Corner